Years ago while looking around for a new bow, I realized that I was never going to spend the money they were going for. Those prices were cheap compared to today. So that’s when I decided that it was time to go traditional and even start making my own bows. I already had all the essentials such as the best drill press and wood sawing machine in my workshop, so all I had to do was spend a little on wood and other essentials. After spending a ton of time online reading and watching how to build bows, I started out with my first one which was a 1 x 4 piece of oak I got from the hardware store. That bow was just the beginning. I quickly moved up to laminating one piece longbows, trying different shapes and then stepping up again to building takedown bows. Here is a step by step build of the last bow I made a few years ago.
My plan for this bow was to be a takedown model. I am getting all the materials together and started on cutting all the pieces. The bow will have a Walnut and ?? riser. Wasn’t sure what to put in the riser yet. Needed to go to the wood store and find something. The limbs will be clear fiberglass, spalted maple on front and back with walnut, bamboo and red or white glass in the core. That’s the plan anyway. Will see if that’s it all pans out. Things tend to change on the way.
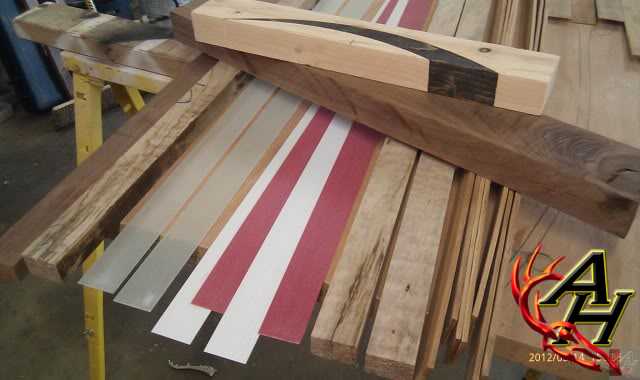
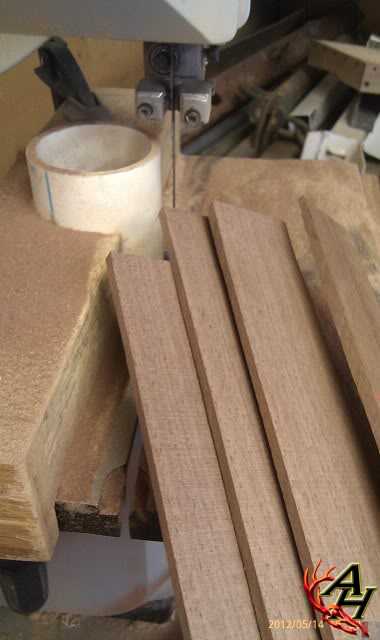
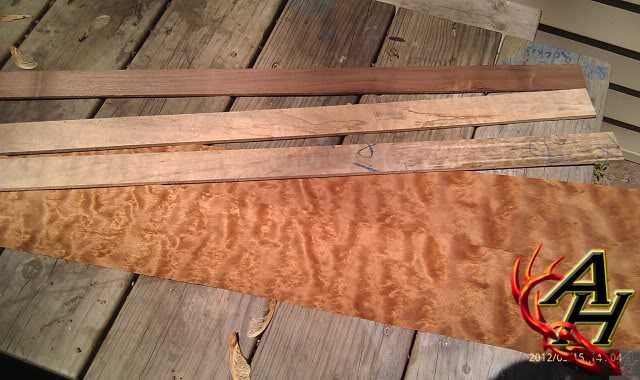
Pictured below is what I started out with. Still needed to plain all the laminate and start the riser.
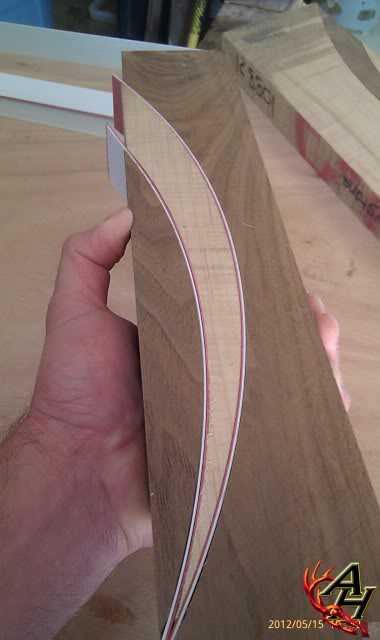
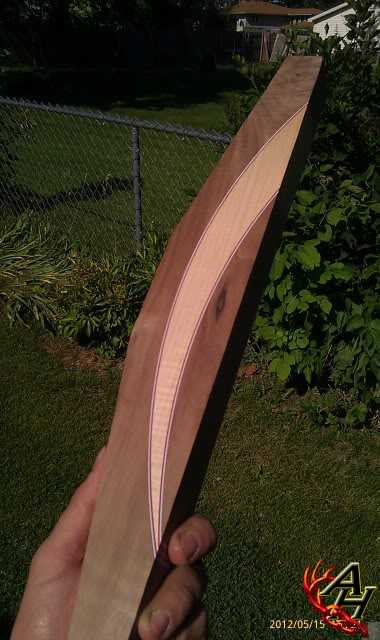
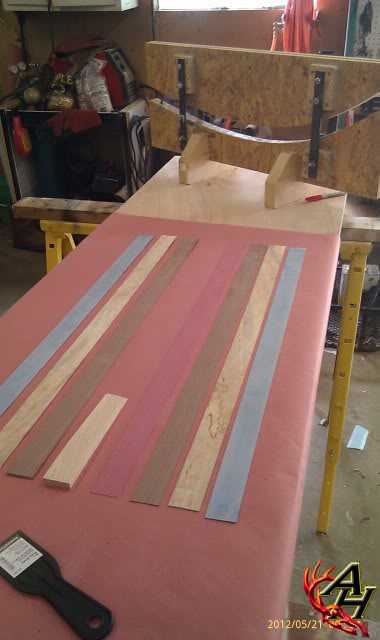
This is the wood that will show up on the limbs. It has a thin coat of clear to kinda give ya an idea what the finished product will look like. It will be a lot better under that glass.
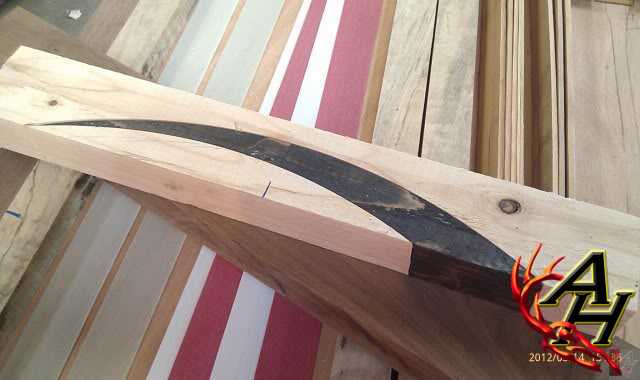
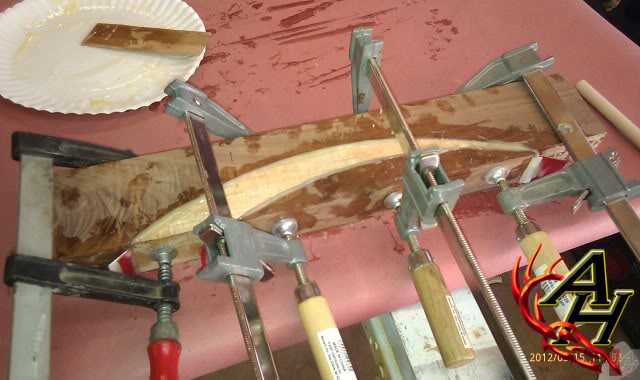
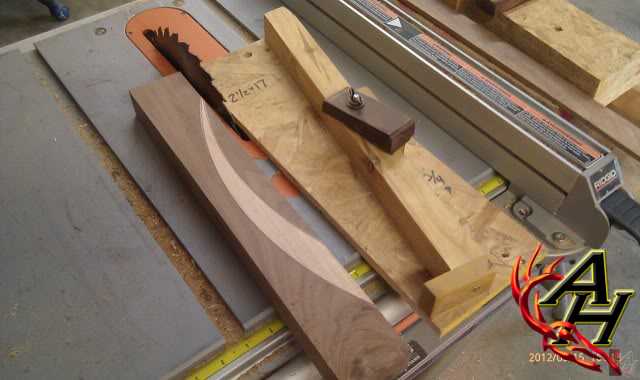
This is the design the riser will have. This is just a test sample I did today to make sure my jigs were still good. The light wood will be walnut and the dark will be ???. It will have some red and or white glass between it all as well.
Was able to get the laminate cut tonight. Will get them planed down to size.
I cut the lams fairly thick so I have plenty of material to work with while planing.
After a 2 hour trip that morning to get a small piece of wood, I decided to put the riser together. Since I am building the riser primarily out of walnut, I wanted to get something that would stand out. I found this piece of light-colored wood with a lot of fire. It said “keystone” on it. I have never heard of this kind of wood, but it looked real nice and will sparkle when finished. Also added are some red and white glass lams. One or both will be in the limbs also.
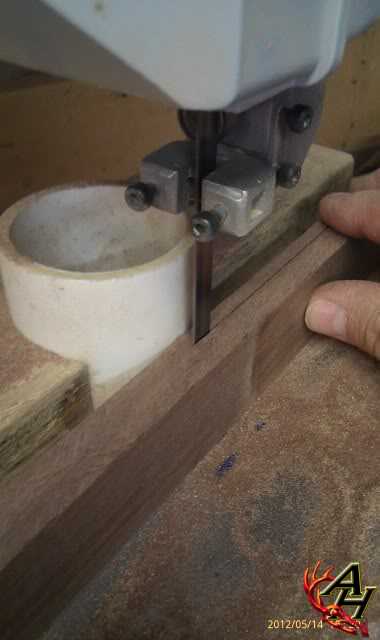
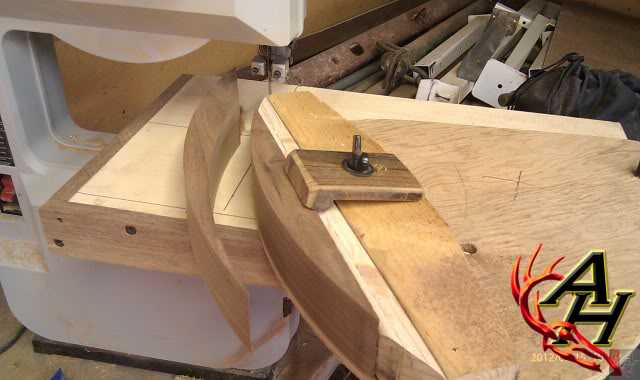
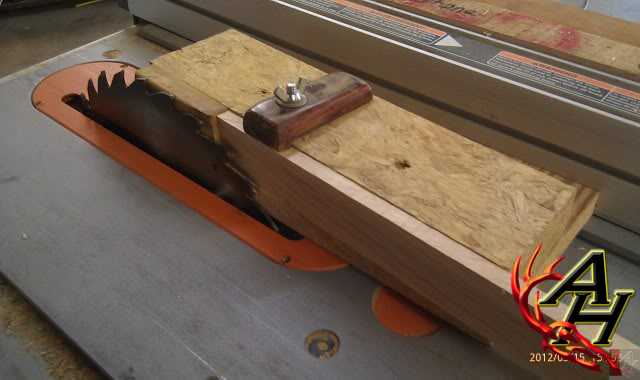
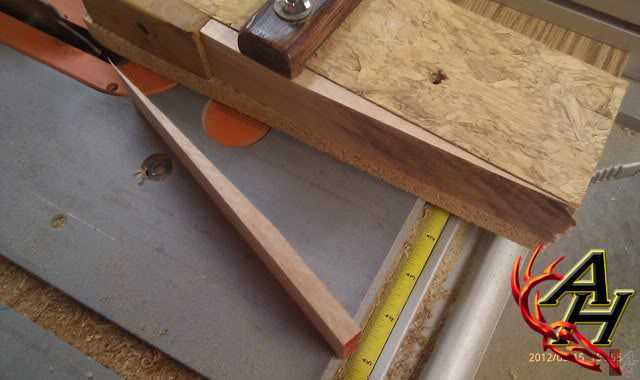
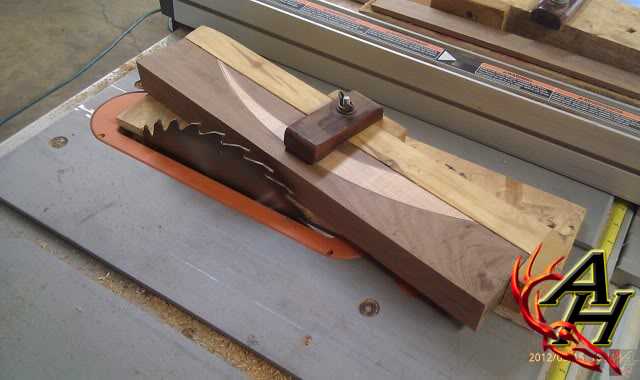
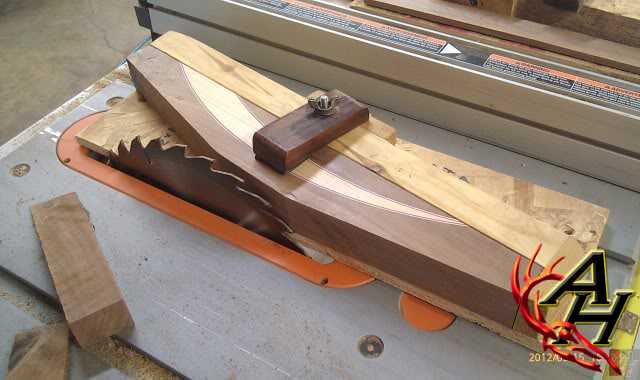
Below is the riser getting cut and glued. The saw fixture is one I built but it’s a standard design and works great. I also use it for cutting circles. You will see all the pieces getting cut, fitted together and glued. After it’s glued, it goes in an oven at 180 degrees for about 4 hours to cure the epoxy.
Hopefully I will be getting a new thickness planer/sander soon and will get the limbs nocked out. But there is plenty to do on the riser. Maybe will get the riser cut and planed down tonight and will post it.
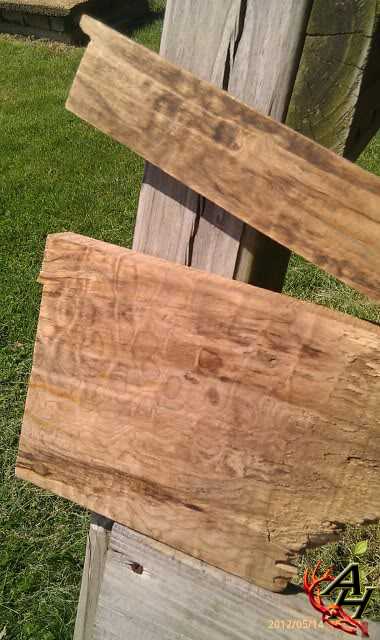
Think I may be changing things up already. Was going thru my wood stack and found some veneer I picked up a while ago. I think this stuff will be the limbs. What do you think?
Don’t think I will be able to use that veneer I posted above. It’s just too thin and take a risk of it cracking during glue up. Will stick with the original plan of the spalt.
While I was waiting for the riser to cook, I got started on the wedges for the limbs. Those are the thicker pieces of wood right where the limbs bolt onto the riser. I am making them out of that same light-colored wood that is used in the riser. Here is my jig and the finished pieces. This is an easy step.
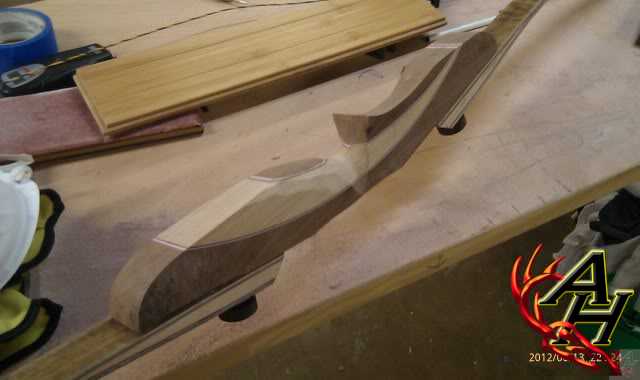
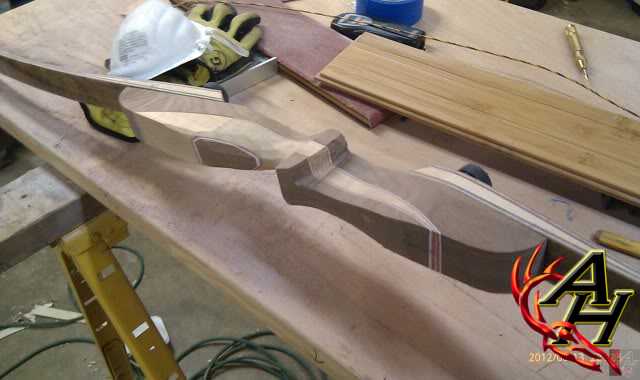
The riser is done cooking and sat out for a while to cool. I had to grind down a lot of epoxy and then plane and rip down to working size. Then with another jig, I cut the angles on both sides for the limbs to bolt on.
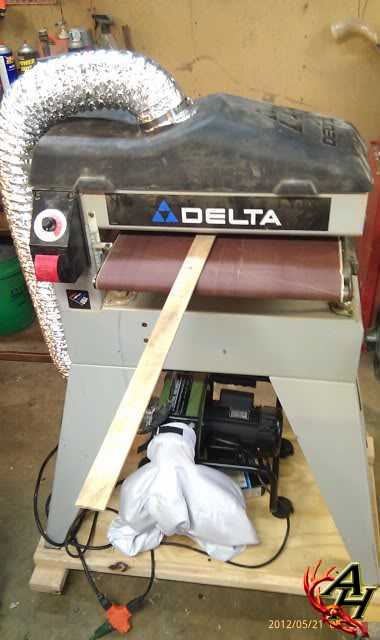
I am ready to put the first limb together. These limbs are built from several layers of woods and fiberglass that are from 0.030” to 0.070” thick. Keeping all these thin laminates uniform in size is pretty important. Each piece is a certain size and some even are tapered in thickness by 0.002” per linear inch in length. My new toy below is what I have waited for to get these limbs done. It’s a drum sander I can make these lams at the exact thickness I want. I have used a standard planer with the blades for a while and it wasn’t the best choice. It would also destroy a lot of pieces in the process. This detail sander makes the job a lot easier and more precise.
With these limbs, the draw weight of the bow is mainly driven by the thickness of the stack of lams. There are a few guides out there that will tell you a bow with a .355 stack will give you a 65# draw. But that doesn’t always work out. It mainly comes from experience. My goal for this bow is 55# so I am building a bow that should be designed for 60#. It’s always easier to take weight off a bow then it is to add to it.
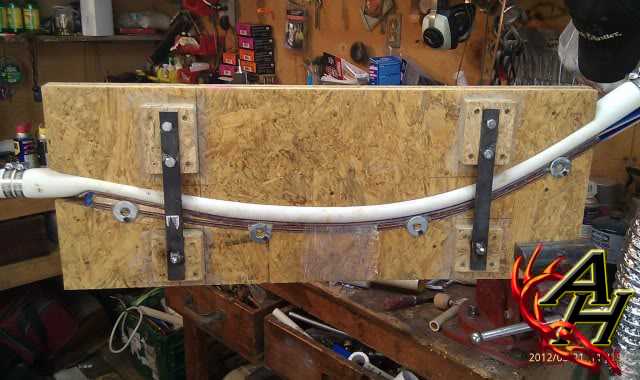
Here are all the pieces for one of the limbs laid out and ready for glue. The form in the back is where all the pieces will go to get compressed and formed. Will follow-up later with the pics of that.
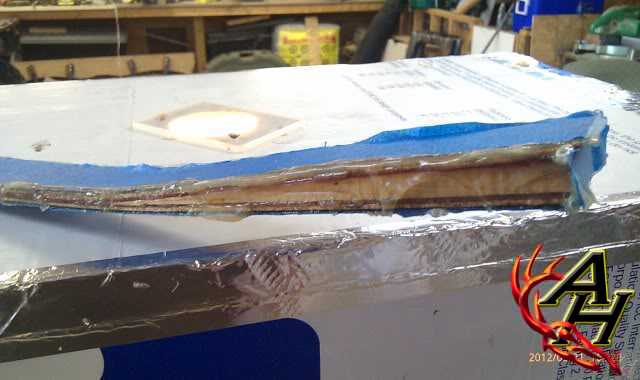
Earlier I got all the lams glued up and put in the form. Each lam has to have the epoxy spread evenly over the entire piece on both sides to make sure that it’s all totally glued. After all the pieces are coated in the epoxy, they are put together and placed in the form. I wish I could have gotten more pics of this, but I was all by myself and hands covered in the glue and cameras don’t really mix to well. With all the pieces in the form, a piece of fire hose that is capped on both sides with an air stem like on a tire on one of the caps. Once the form is all together and bolted together, the fire hose will be inflated and sandwich all the laminates together and squeeze out all the glue and air bubbles (hopefully). Air bubbles will ruin a bow which happened last year while building the St. Jude bow. The one that went to the auction was actually the 2nd attempt as the first one had some little air bubbles under the clear glass which obviously showed up. I didn’t like it so I started a new one. I did finish the bow and gave it to my dad to shoot. It works fine, just has a couple little cosmetic flaws. Now that everything is in the form and compressed, it goes into the oven for 4 hours at 170-180 degrees to cure the epoxy. After 4 hours, I will let it sit in form for an hour in open air then pull it out of form. Usually I will let it sit over night but I may get anxious and start sanding on it so I can see what it looks like.
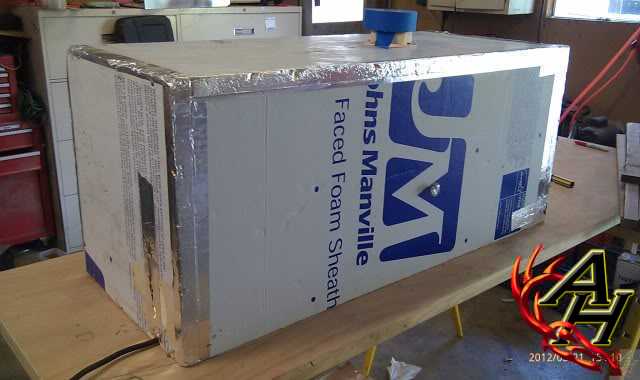
My oven is pretty high-tech. Just a box made from 1” foam and a couple of 75w light bulbs mounted on a board that heat it. After this cook, this one is getting scrapped and will be building a new one just like it. Its worn out and just needs replaced.
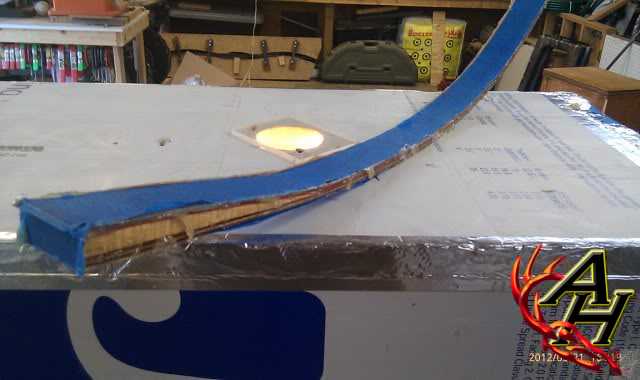
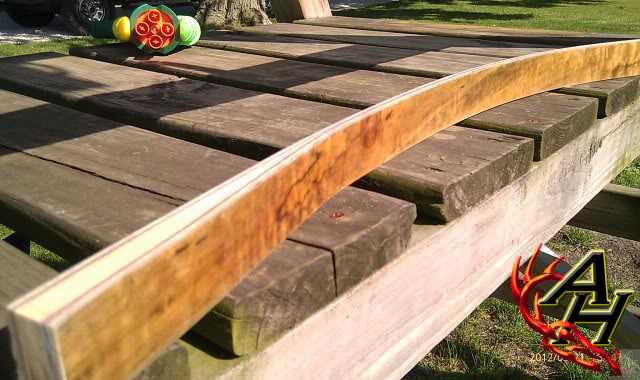
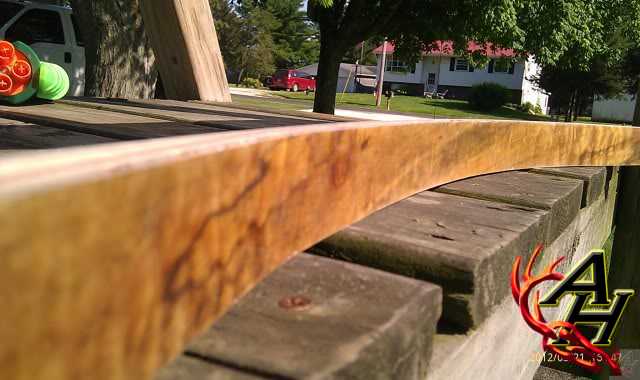
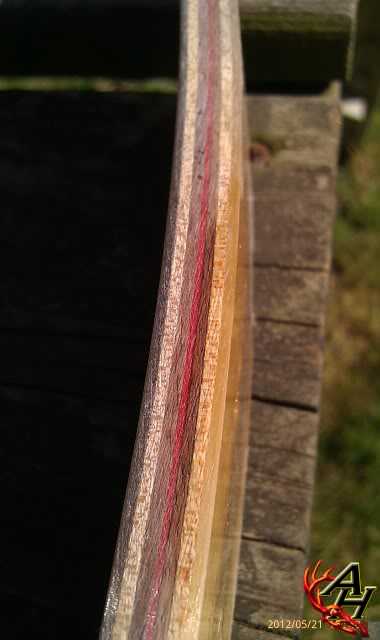
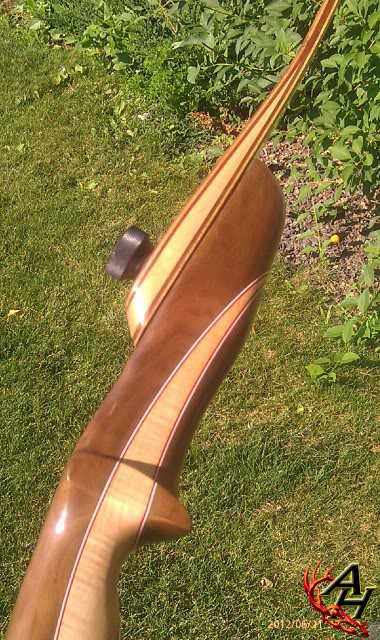
Pulled the first limb out of the form. Very happy with it and the spalted flamin maple looks better than I thought. Both sides of the limbs have the same maple under clear glass.
The first couple pics are what it looks like right out of the form. I then have to sand the edges down flat and remove all that glue.
Everything is built and cut to preliminary shape.
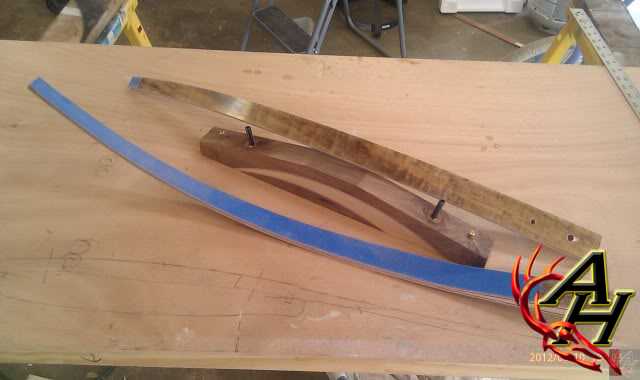
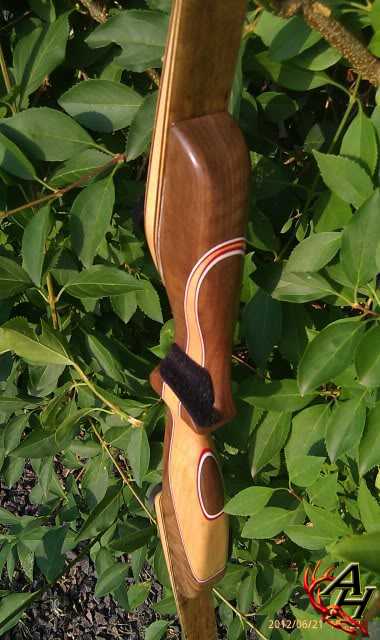
Got the limbs mounted on the riser.
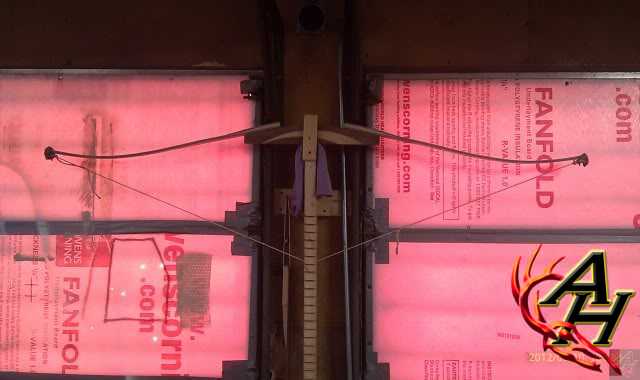
Once the limbs are mounted, this is the time to tune the limbs and set a weight. I wasn’t able to get much on tuning done yet, but I am able to put a tight string on it now. The string you see on the bow now is long and just used for initial minor draws. At this stage I will work the limbs and make them draw evenly and set the weight about 8 pounds heavier than my goal weight.
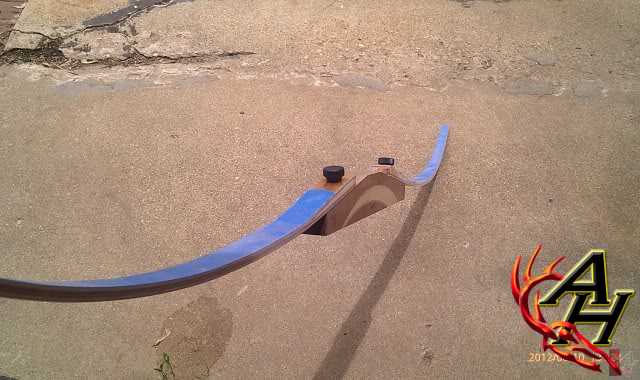
Starting to take shape.
Well, It’s all done….it was anyway. I was trying to get it shooting just perfect and tweaking it and tweaking it until !!! SNAP !!! One of the limbs split on me. It was my fault. Oh well, that’s the good part about these 3 piece bows. I only have to build a new piece and not a whole bow.
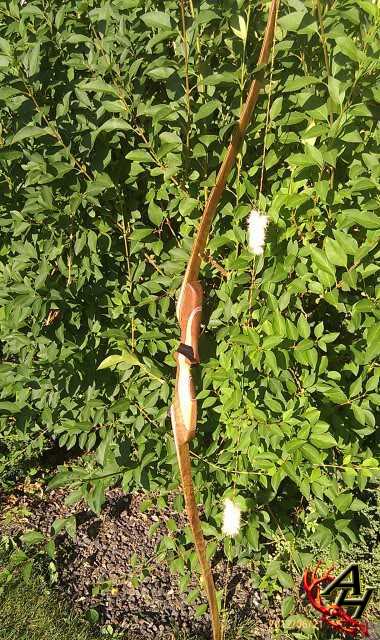
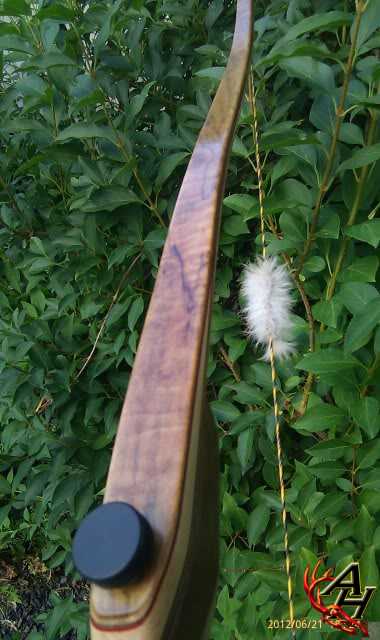
Here is the bow all finished up before I broke it.
I never did finish that bow after I broke it. I still have it and need to have new limbs made. That was the last bow I built as I developed an allergy or something to wood dust. After many years of building custom games calls and the best longbows, I probably should have worn a dust mask. I still may get back into this again someday but it’s not gonna happen anytime soon.
Comprehending the instruments of the trade is crucial to attaining accuracy and reliability in the…
A UTE in Australia and New Zealand is what some other areas around the world…
There are not many items in our hunting and fishing arsenal that are more important…
With being an avid fisherman on an average budget, the ability to spend high-quality money…
If you're in the market and looking for the best red dot sights, Vortex and…
In the realm of culinary adventures, grilling venison stands as a remarkable journey. Venison, the…
View Comments
This is beautiful! And such awesome instructional photos. You've got a special talent!
I never thought how difficult is to built a bow. I like the photos and learned new things from this blog.
It looks like a taken down recurve bow, Matt
Nick, It's actually a hybrid between a straight longbow and a recurve. Commonly referred to as reflex deflex limbs or just a hybrid longbow.
Great Job!!
Awesome read! Do you know why your limbs snapped?
Trent. I ended up cutting the string grove too deep and it split the lamination all the way down. My heart was crushed. Still have that riser.